How To Use Wood Chunks In A Masterbuilt Gravity Smoker

As an avid barbecue enthusiast, I’ve always sought the best techniques and tools to perfect the art of smoking. One game-changing device that’s caught my attention is the Masterbuilt Gravity Smoker.

It’s a revolutionary blend of a charcoal grill and advanced technology that makes smoking with wood chunks an absolute breeze. I’ve found that leveraging this smoker can considerably amplify the smoke flavor of your meats, giving you that sought-after, savory punch with every bite.
Today, I’m excited to share some of the essentials I’ve learned about maximizing the capabilities of this fabulous cooking gear. Let’s dive in and discover how to harness the full potential of the Masterbuilt Gravity Smoker with wood chunks to create an unforgettable barbecue experience.
Key Takeaways
- Do not soak your wood chunks; it’s unnecessary in a Masterbuilt Gravity Smoker.
- Limit smoke wood addition to no more than 1/2 lb. at a time for consistent smoke levels.
- For broad flavor distribution, place wood in the ash bucket or mix with charcoal in the hopper – max 1 1/2 lbs.
- Use vents and the digital control panel for airflow management and precise temperature control.
- For extended smoking sessions, monitor your smoker’s temperature and adjust for optimal smoking conditions.
- Maintain cleanliness and good condition of your smoker to ensure persistent high performance and delectable smoke flavor.
The Masterbuilt Gravity Series: The Smoker Revolution
When the Masterbuilt Gravity Series hit the market, it was clear that the world of BBQ would never be the same. This innovative series marked a turning point for outdoor cooking enthusiasts, bringing the power of precision and convenience into the authentic realm of charcoal smoking.
As a devotee of robust BBQ flavors, I was instantly intrigued by the promise of the Gravity Series, fusing the ease of a gas grill with the deep, smoky flavors of a charcoal-based BBQ Smoker Grill.
Understanding the Gravity Series Technology
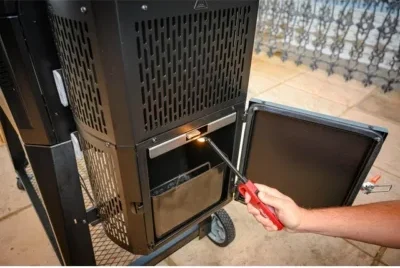
At the heart of the Masterbuilt Gravity Series lies the ingenious GravityFed™ Charcoal Hopper, a patented design that streamlines the smoking process. All it takes is loading up the hopper with your preferred charcoal, igniting it with a firestarter, and then letting the innovative DigitalFan™ take the reins.
This fan ensures that my desired temperature is flawlessly maintained without the fuss of constant monitoring and adjustments. The magic of this technology is embodied in the simplicity of the set-and-forget experience it provides.
The Evolution of the Masterbuilt Gravity Smoker Experience
The evolution of the Masterbuilt Gravity Series from its inception has been nothing short of impressive.
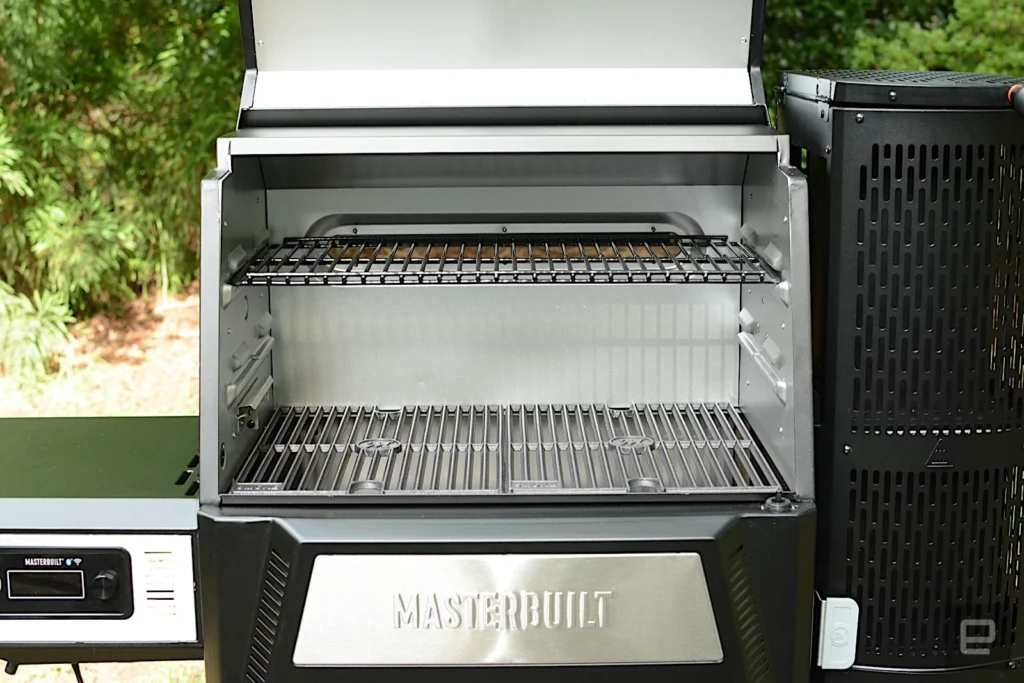
Starting with models such as the 560, 800, and 1050, which mainly differ in terms of cooking surface and insulation, Masterbuilt has continuously enhanced the functionality and safety of these smokers.
Wi-Fi and Bluetooth connectivity have become staple features, enabling remote monitoring that adds a layer of convenience unrivaled by traditional smokers. With rotisserie kits and other accessories, the versatility is only limited by one’s culinary imagination.
| Feature | Benefits | Found in Models |
|---|---|---|
| GravityFed™ Charcoal Hopper | Consistent fuel feed, extended smoking sessions | 560, 800, 1050 |
| DigitalFan™ for Temp Control | Precision temperature control, less monitoring | All models |
| Connectivity | Wi-Fi & Bluetooth, remote adjustments and monitoring | All models |
| Safety Features | Safety switches, porcelain-lined chambers | Updated models |
| Accessories | Increased versatility, including rotisserie option | Select models |
As a passionate BBQ smoker grill enthusiast, it’s clear to me that the Masterbuilt Gravity Series has not only revolutionized the smoking process but also widened the horizons for what can be achieved in my backyard cookouts.
Whether I’m a novice or a seasoned pro, the Gravity Series empowers me to create culinary masterpieces with ease and reliability, bringing people together over the love of perfectly smoked BBQ.
Choosing the Right Wood Chunks for Your Gravity Smoker
When I look to create that perfect barbecue, I know that the kind of wood chunks I choose is just as important as the cut of meat. It’s about finding the right balance between the flavor and the burn duration.
With wood chunks, lump charcoal, and charcoal briquettes all offering different benefits, it’s essential to make the right choice to enhance my smoking wood experience with my Gravity Smoker.

Types of Wood Chunks and Their Flavors
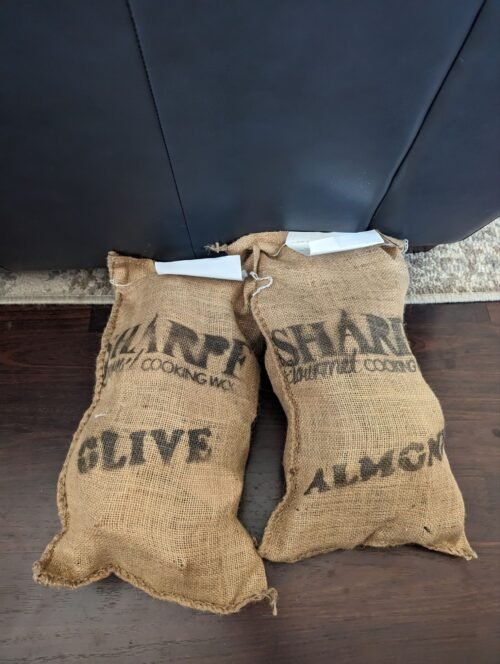
Every type of wood chunk brings a unique touch to the meal I’m preparing. If I’m after a sweet and fruity smoke, I go for apple or cherry wood chunks. For something with a bit more bite, hickory and mesquite are my go-to options when I want that bold, smoky flavor to penetrate the meat.
Because each type of wood imparts its own distinct flavor profile, I always consider the final taste I wish to achieve when selecting my smoking wood.
- Apple: Delicate with a hint of sweetness, excellent for poultry and pork.
- Cherry: Mild and fruity, versatile for most meats.
- Hickory: Rich and strong for a classic BBQ taste, perfect for ribs and briskets.
- Mesquite: Intense and earthy, ideal for red meats.
Lump Charcoal Vs. Briquettes: Which to Choose for Your Smoker
In my smoking adventures, I’ve learned that the base fuel is almost as influential as the wood chunks themselves. Lump charcoal, made from pure hardwood, offers a high-heat, clean-burning option with minimal ash.
This means I can maintain the purity of those subtle wood flavors. On the flip side, charcoal briquettes are fashioned for longevity, ensuring a steady temperature is held over more extended smoking sessions. However, I remain cautious as briquettes can introduce additional odors due to the binders and fillers within them.
| Lump Charcoal | Charcoal Briquettes |
|---|---|
| Cleaner burn with less ash | Longer, consistent burn time |
| Quick to light and high heat | Economical and easy to find |
| Subtle smoky flavor enhancement | Potential additional odors from binders |
Taking into account the flavor and the duration of my smoke, I tend to lean towards lump charcoal for quicker grilling sessions, but for those full-day smokes, briquettes ensure I don’t have to constantly refuel.
No matter what I choose, I make sure to not overlook the quality of the brand. High-quality wood chunks and charcoal make all the difference in my smoked creations.
Step-by-Step Guide to Using Wood Chunks in Gravity Smoker
Embarking on a smoking session with your trusty Gravity Smoker can be one of the most rewarding culinary adventures. The key to that deep, rich smoky flavor lies in the proper setup and technique.
Here’s my go-to guide on how to seamlessly integrate those fragrant wood chunks into the process, ensuring a mouthwatering feast every time.
First things first, I always begin my Gravity Smoker setup by placing my charcoal within the charcoal tray. I arrange the briquettes on one side to engineer dual heat zones that will cater to different cooking needs.
Once the charcoal is neatly stacked, I reach for my stainless-steel tongs—an indispensable tool when it comes to adding wood chunks and maneuvering the hot coals.
After lighting the charcoal and seeing that comforting orange glow, I place a water pan on the unlit side of the tray. This simple step is monumental in infusing moisture and enhancing the flavor of the smoke as the magic unfolds.
As the coals catch fire and the temperature rises, I ensure it stabilizes at the desired level before I even think about introducing my food onto the cooking grate.
When it’s time, I distribute the wood chunks over the lit charcoal. There’s no pre-soaking required—just raw wood meeting fire. I then close the lid and let the smoke mellow out until it’s running clean, a signal that we’re ready to place the food inside the chamber.
For those longer smoke-outs that extend beyond 30-minutes, I’m prepared to add more charcoal, adjusting the vents to keep that temperature in the sweet spot.
- Arrange charcoal on one side of the charcoal tray to create heat zones.
- Use stainless-steel tongs to add wood chunks.
- Place a water pan on the opposite side for moisture.
- Ensure the smoker reaches the desired temperature before adding food.
- Disperse wood chunks over the charcoal and close the lid for clean smoke.
- Add more charcoal and adjust vents for longer cooking times.
Fusing these techniques into your smoking guide narrative elevates the barbeque experience, turning a simple cookout into a savory symphony of flavors. So, next time you’re up for some smoking, remember the twin pillars of patience and precision. With these in practice, the Gravity Smoker will do more than cook; it’ll perform culinary alchemy on your palate.

Using Wood Splits In Masterbuilt Gravity Smoker
I’ve practiced 2 different ways of using wood splits in my 560. The first way is to lay a bed of Lump charcoal at the bottom of the hopper. Light it and wait for your smoker to reach temp. After the pit reaches temperature is when i usually add about two smaller size splits. Sometimes even 3 depending on the size of the splits.
My thought process is that I want enough room for the air to keep the wood burning. From this point on you need to watch the temperature. When it starts to dip put in one to two more splits and turn the temp up just a bit. The point of turning it up a bit helps the new wood light faster.
When the new splits reach the new temp that you set you can turn the pit back down to the temp you need it at and crack open a beer!
The other option is a lot easier. With this option, I load up the bottom of the hopper with some lump, but I don’t light it just yet. I put in about two splits and stuff lump charcoal around them. This allows for the lump to keep the wood lit and continue that smoke smell/taste. You won’t need to watch the pit as often with this method.
Tips for Optimizing Smoke Flavor in Your Masterbuilt Gravity Smoker
As an enthusiast of backyard barbecues, I’ve always been fascinated by the allure of smoke flavor optimization. With my Masterbuilt Gravity Smoker, achieving that perfect balance of smoky goodness has become a delightful pursuit.
Today, I’m going to share some tips on how to measure your wood chunks and the best places to put them to get the most aromatic infusions in your barbecuing adventures.
How Much Can I Use: Measuring Wood Chunks for the Perfect Smoke
Getting the measure right is crucial when adding wood chunks to your Gravity Smoker. It’s important to keep in mind that you should add no more than 1/2 lb. at a time.
This helps in avoiding the pitfall of over-smoking and ensures a gradual flavor infusion that doesn’t overpower your food’s natural tastes. By being cautious with the quantity, you are set on a path towards achieving smoke flavor nirvana.
Location Matters: Where Do I Put the Wood Chunks for Best Results
Wood chunk placement within your smoker can make all the difference between good barbecue and great barbecue. For a start, placing wood chunks in the ash bucket can capitalize on the heat of falling embers to create a gentle smolder.
Alternatively, mixing the chunks within the hopper leads to an inherent integration of smokiness as they catch fire during the cooking process. The key is to find out which placement distributes the smoke better for your specific needs and enhances the flavor profile of your food.
In both instances, it’s beneficial to have a keen eye on temperature control. This could mean the difference between a lightly kissed smoke flavor and a more pronounced one. Using the digital control panel of your Masterbuilt smoker or toggling settings via the mobile app lets you adjust for the sweet spot in smoking temperature.
Plus, keeping an eye on the ventilation helps in maintaining a clean smoke output. This is essential for the pristine taste we’re all after when we smoke.
My personal barbecuing sessions have transformed ever since adopting these methods—particularly the use of the digital control panel for precise temperature control. It’s a game-changer that lets me dial in on exact heat settings, allowing for the smoke flavor to penetrate delicately within each layer of the food’s texture.
When it’s all said and done, what we strive for in our barbecuing endeavors is that deep, comforting essence of wood-smoked food that hints at both tradition and culinary innovation.
With a Masterbuilt Gravity Smoker and these guidelines, you’re well on your way to becoming a flavor maestro at your next outdoor feast.

Maintaining Your Masterbuilt Gravity Smoker for the Best Performance
Keeping your Masterbuilt gravity smoker in top condition is crucial for ensuring that it delivers outstanding results every time you fire it up.
Not only does regular maintenance extend the lifespan of your smoker, but it also improves fuel efficiency and cooking performance. Let me share some key steps for proper cleanup and ways to enhance the longevity and efficiency of your smoker.
Cleaning and Storing Your Smoker Properly
When it comes to cleaning your gravity smoker, I follow a regimen that balances thoroughness with the preservation of the smoker’s seasoned interior. After each use, I recommend a high-temperature burn-off to dislodge any stubborn residue.
Then, when the smoker has cooled down, use a natural brush to sweep out the ash and food particles, finishing the process with a damp cloth to wipe down surfaces. Remember, the goal is to clean without stripping away that coveted seasoning that contributes to flavor over time.
For storing your grill, always find a spot shielded from the elements. Covering your smoker with a Masterbuilt cover ensures protection from rain, snow, and sun, which can otherwise lead to rust or weather-related damage. Proper storage ensures that your smoker is always ready for your next BBQ session with minimal need for any touch-ups.
Monitoring Fuel Efficiency and Reducing Wastage
Becoming mindful of fuel efficiency isn’t just good for your pocket; it’s an eco-friendly practice too. If you find your charcoal consumption is higher than anticipated, it might be an indication to check your smoker’s setup.
Ensure that fire bricks and venting systems are in place and functional. The Masterbuilt’s innovative DigitalFan™ feature is designed to regulate airflow precisely, which I rely on to maintain a consistent temperature and reduce the rate at which I go through charcoal.
What’s more, by utilizing a manifold kit, I’m able to decrease the likelihood of flare-ups during cooking, making post-cook cleanup easier and helping to conserve fuel at the same time.
| Maintenance Task | Benefit | Frequency |
|---|---|---|
| High-temp burn-off | Removes residue without harsh chemicals | After high-residue cooks |
| Natural brush cleaning | Preserves smoker’s seasoning | After each use |
| Protective storage | Prevents rust and weather damage | When not in use |
| DigitalFan™ management | Improves fuel efficiency | During cooking |
| Manifold kit installation | Reduces flare-ups, simplifies cleaning | As needed |
By incorporating these maintenance and efficiency practices into your routine, you’re not just taking care of your Masterbuilt smoker; you’re investing in countless future gatherings filled with the unmistakable aroma of perfectly smoked delicacies.
Trust me, your efforts in Masterbuilt smoker maintenance and learning the ins and outs of your cleaning gravity smoker and storing grill effectively will pay off when your friends and family gather around to enjoy the fruits — or should I say, the meats — of your labor.
Conclusion
Delving into the culinary art of smoking with a Masterbuilt Gravity Smoker has been a transformative experience for me. It’s more than just cooking; it’s about mastering wood chunks to unlock rich, smoky flavors that elevate barbecue to an art form.
By selecting the appropriate wood types, I’ve discovered the depths of flavor that can be imparted to meats and vegetables, each type offering a unique profile to my culinary creations. It’s exciting to think that by gaining an understanding of these nuances, we can all expertly influence the taste of our smoked dishes.
The Gravity Smoker experience isn’t just about flavor, though. It’s also about understanding the importance of maintaining the right conditions for smoking. Through my journey, I’ve learned that optimal placement and a systematic setup are crucial for achieving the perfect smoke.
There’s a satisfying sense of accomplishment when I follow my tried-and-true process and witness the mouthwatering results. Moreover, the regular maintenance and careful storage of my smoker ensure that every barbecuing session is as rewarding as the last.
With these barbecuing tips and lessons in mind, I feel confident in my ability to impress with not just the flavor but also with the texture and aroma of smoked delicacies. Embracing the innovative traits of the Masterbuilt Gravity Series has undeniably expanded my smoking expertise.
Now, as I look forward to many more mouth-watering barbecues, I’m eager to share the joys of a well-smoked meal with friends and family, making every gathering an unforgettable feast.
FAQ
How do I start using wood chunks in my Masterbuilt Gravity Smoker?
It’s quite simple! I recommend starting with 1/2 lb. of wood chunks added to either the ash bucket for a broader flavor or mixed with your charcoal in the hopper. Remember never to soak the wood chunks, as that’s not necessary with the Gravity Series grill.
What’s the technology behind the Masterbuilt Gravity Series?
The Gravity Series uses GravityFed™ Charcoal Hopper and DigitalFan™ technology to control temperature and airflow. Charcoal is loaded into a chamber and ignited, and then a fan system maintains the temperature you desire, combining the authenticity of charcoal with the convenience of a set-and-forget smoker.
How is the Masterbuilt Gravity Smoker different from its predecessors?
The Gravity Smoker showcases evolutionary updates, including Wi-Fi and Bluetooth connectivity, porcelain-lined charcoal chambers, and safety switches. The models vary mainly by the cooking surface area, insulation, and additional accessories like a rotisserie kit.
Which wood chunks should I choose for my smoker, and how do they affect flavor?
There are various wood chunks like hickory, apple, and mesquite, each imparting different flavors. Choice of wood chunks greatly influences the taste of your smoked food, so experiment to find your favorite smoke profile!
Should I use lump charcoal or briquettes with my wood chunks?
It depends on your smoking needs. Lump charcoal burns cleaner and pairs well with chunks for subtle flavors, while briquettes offer a longer, more sustained burn, useful for longer smoking sessions, though they may introduce different flavors due to binders in the briquettes.
How do I set up my Gravity Smoker for optimal use of wood chunks?
For a successful setup, arrange your charcoal on one side of the tray for two heat zones and use stainless-steel tongs to safely add wood chunks. Place a water pan opposite the charcoal for added moisture, then disperse wood chunks over the lit charcoal, and close the lid to build up clean smoke before adding food.
How much can I use: what’s the right amount of wood chunks for my Gravity Smoker?
For optimal smoke flavor, add no more than 1/2 lb. of wood chunks at a time. This prevents over-smoking your food and delivers a smooth flavor infusion.
Where do I put the wood chunks for best results?
The wood chunks can go directly in the ash bucket to smolder or be mixed within the hopper with your charcoal. Be mindful of not exceeding 1 1/2 lbs. of wood in the hopper to maintain proper airflow and temperature control.
What’s the best way to clean and store my Gravity Smoker?
Cleaning your smoker involves a high-temperature “burn off” or traditional scrub with a natural brush. To store, place it in an area protected from harsh weather. Regular maintenance is key to longevity and performance.
How can I ensure I’m using fuel efficiently in my Gravity Smoker?
Pay attention to how fast your charcoal burns. Excessive speed may indicate a problem with fire brick setup or overall grill design. Use the DigitalFan™ to maintain consistent temperatures and control airflow for fuel efficiency. Optional accessories, like a manifold kit, can also help manage and reduce fuel usage.

